Launching a Ghost Blog with AWS Lightsail
Over the last year I have spent time here and there dabbling with AWS, so I with the new year I decided to make a more concerted effort with not only AWS, but my journey into the tech industry.
With my AWS free tier reaching the end of its duration of 1 year, I needed to make a decision when it came to choosing a compute option for my own website, how and what to use not only within AWS, but as my CMS (Content Management System). Starting with the available compute options within AWS there's EC2, Lambda, ECS/EKS, & Lightsail.
Of the options I chose to go with Lightsail. The issues with other are the following: ECS/EKS while a useful tool for containerized workloads would be overly complex for what is simply a personal site/blog. The issue with Lambda, would be I either have to do extensive workarounds to get Ghost to work or go with a different CMS entirely. EC2 while free currently would become more expensive than Lightsail once the free tier is done.
As for the reason I decided to go with Ghost as my CMS, the reasons are actually much simpler. AWS Lightsail comes with a few preconfigured images/snapshots already available so the one I decided to go with was Ghost.
Moving onto the steps necessary to launch, configure, & display your instance not only online, but with your domain.
1. Launch an Instance on AWS Lightsail
Once you log into are in the AWS Console go to the navigate to the compute option and choose Lightsail. If you are unable to find it you can use the search console to find Lightsail at the top.
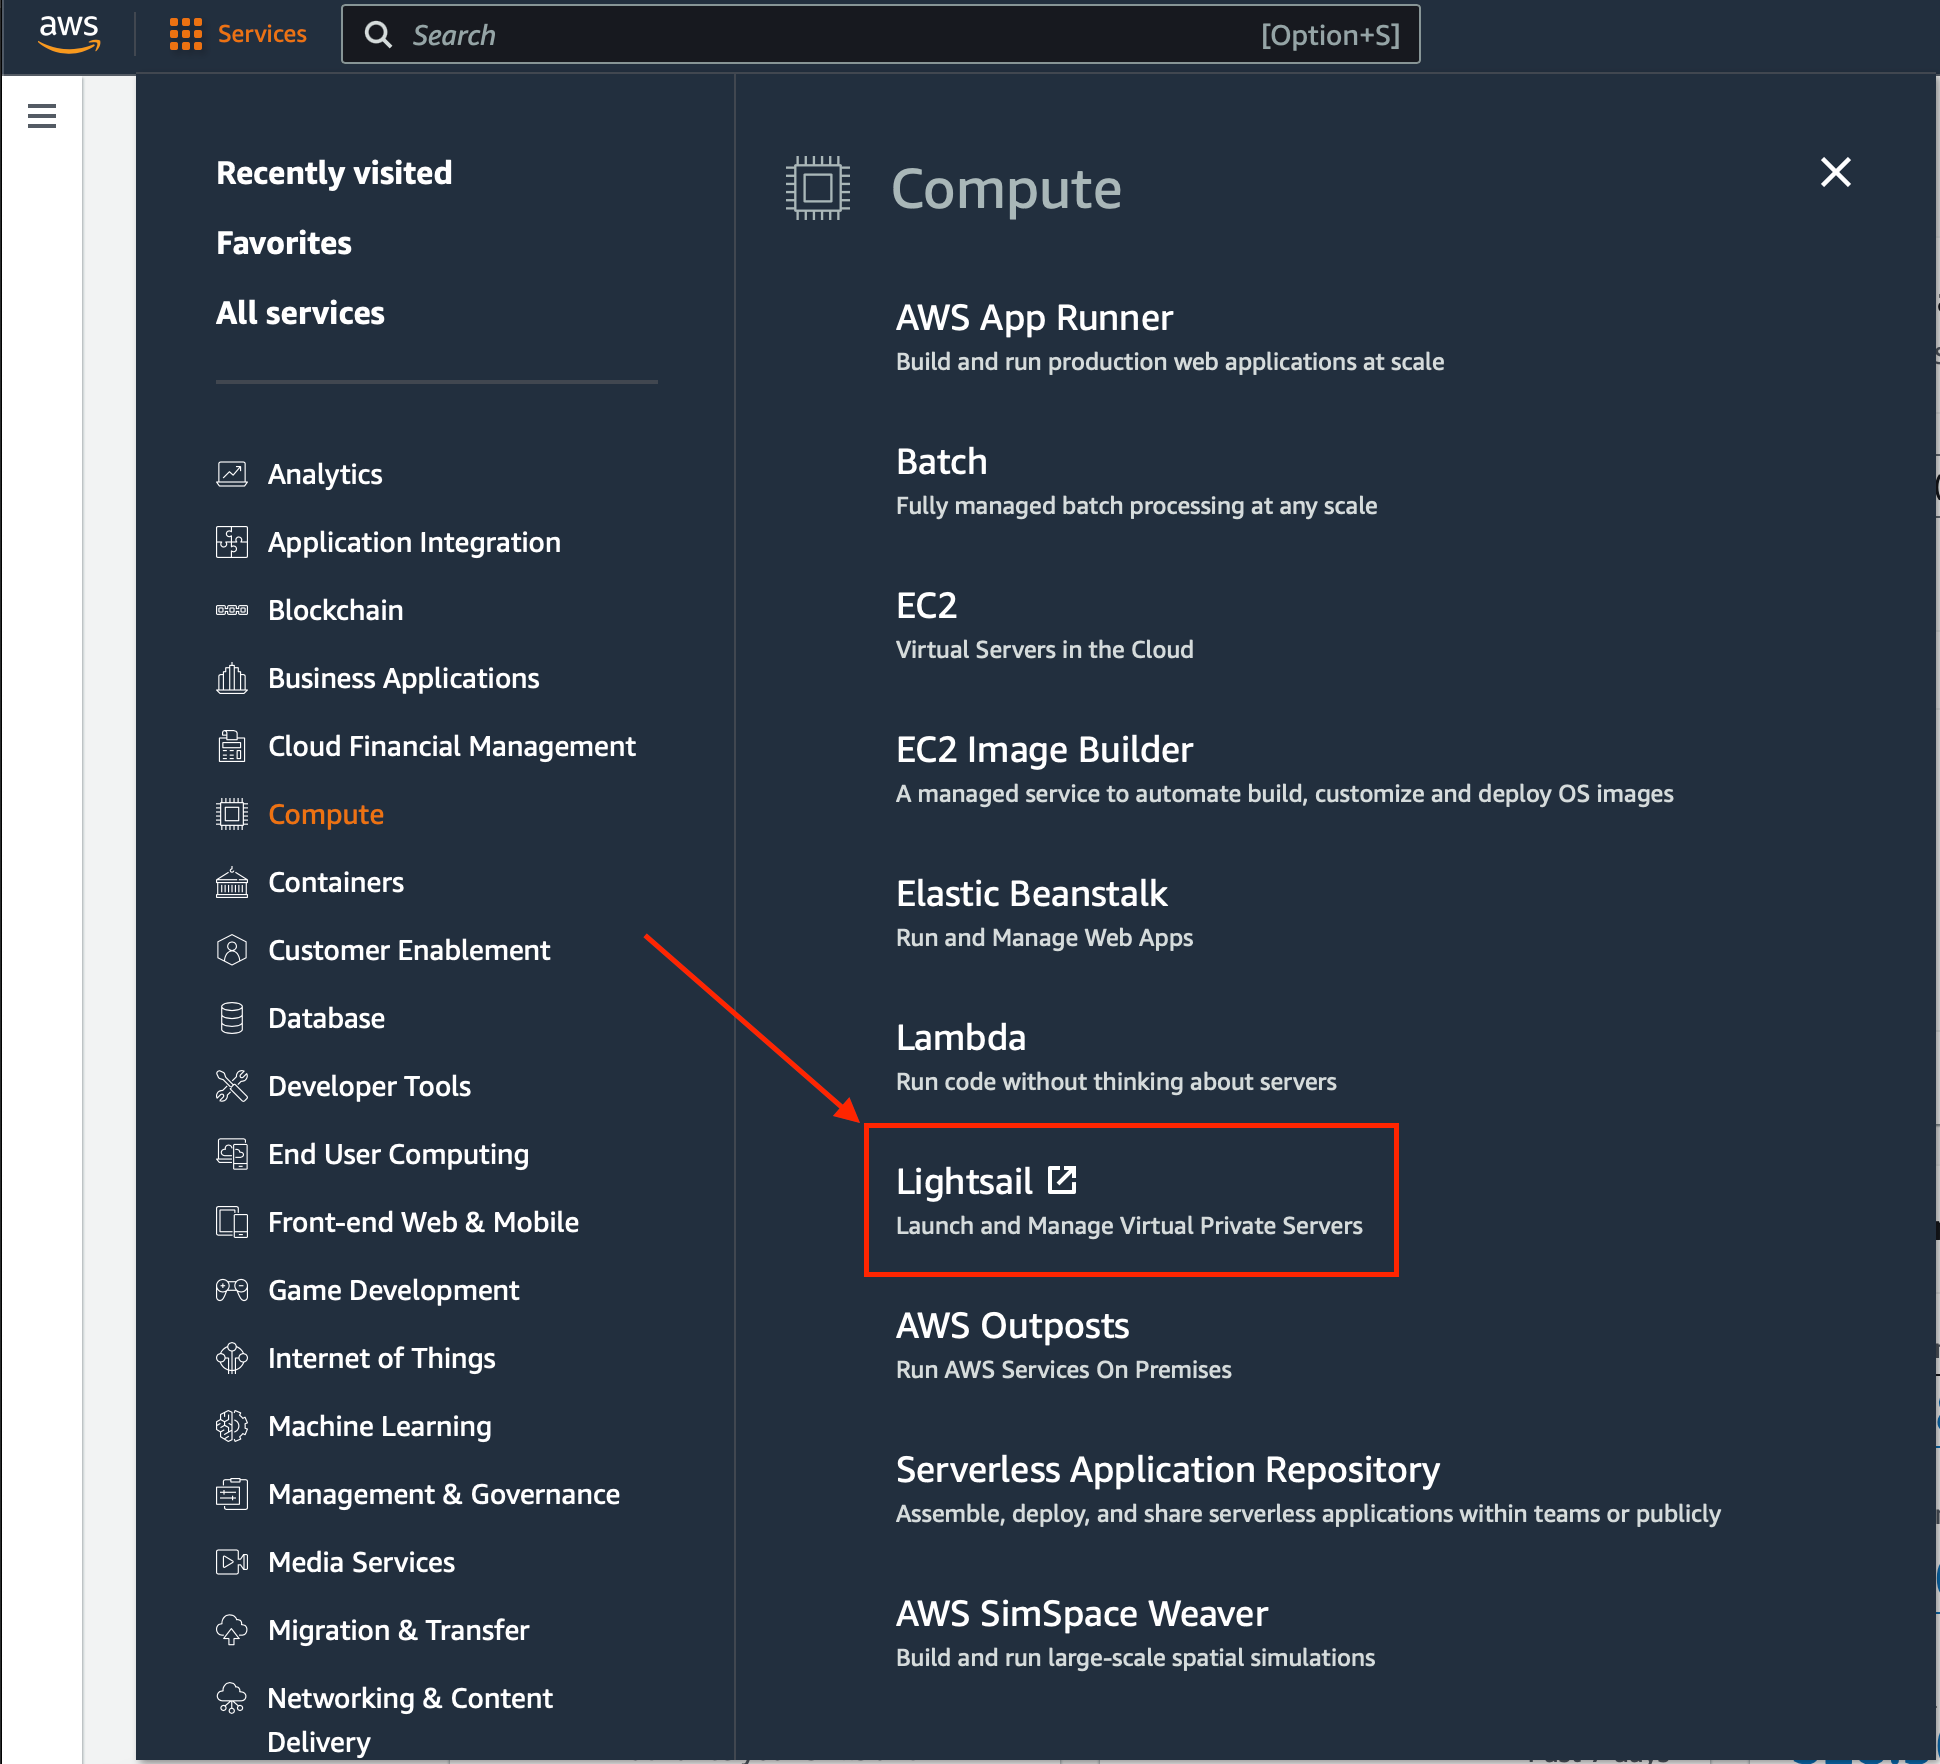
Once you click on Lightsail it will open a new tab and take you to the Amazon Lightsail console. If you haven't created an instance before, Lightsail will have a screen to create your first instance, if you have created an instance you will have to navigate to "Create instance" button.

In the "Create an instance" console you will be given the following options
- Instance Location
- Instance Image
- Select Platform/OS
- Select a blueprint
- Optional
- Add a launch script
- Change SSH Key Pair
- Instance Plan
- Network Plan
- Instance Size
- Identify you Instance
- Unique Name
- Key Only Tags
- Key-value Tags
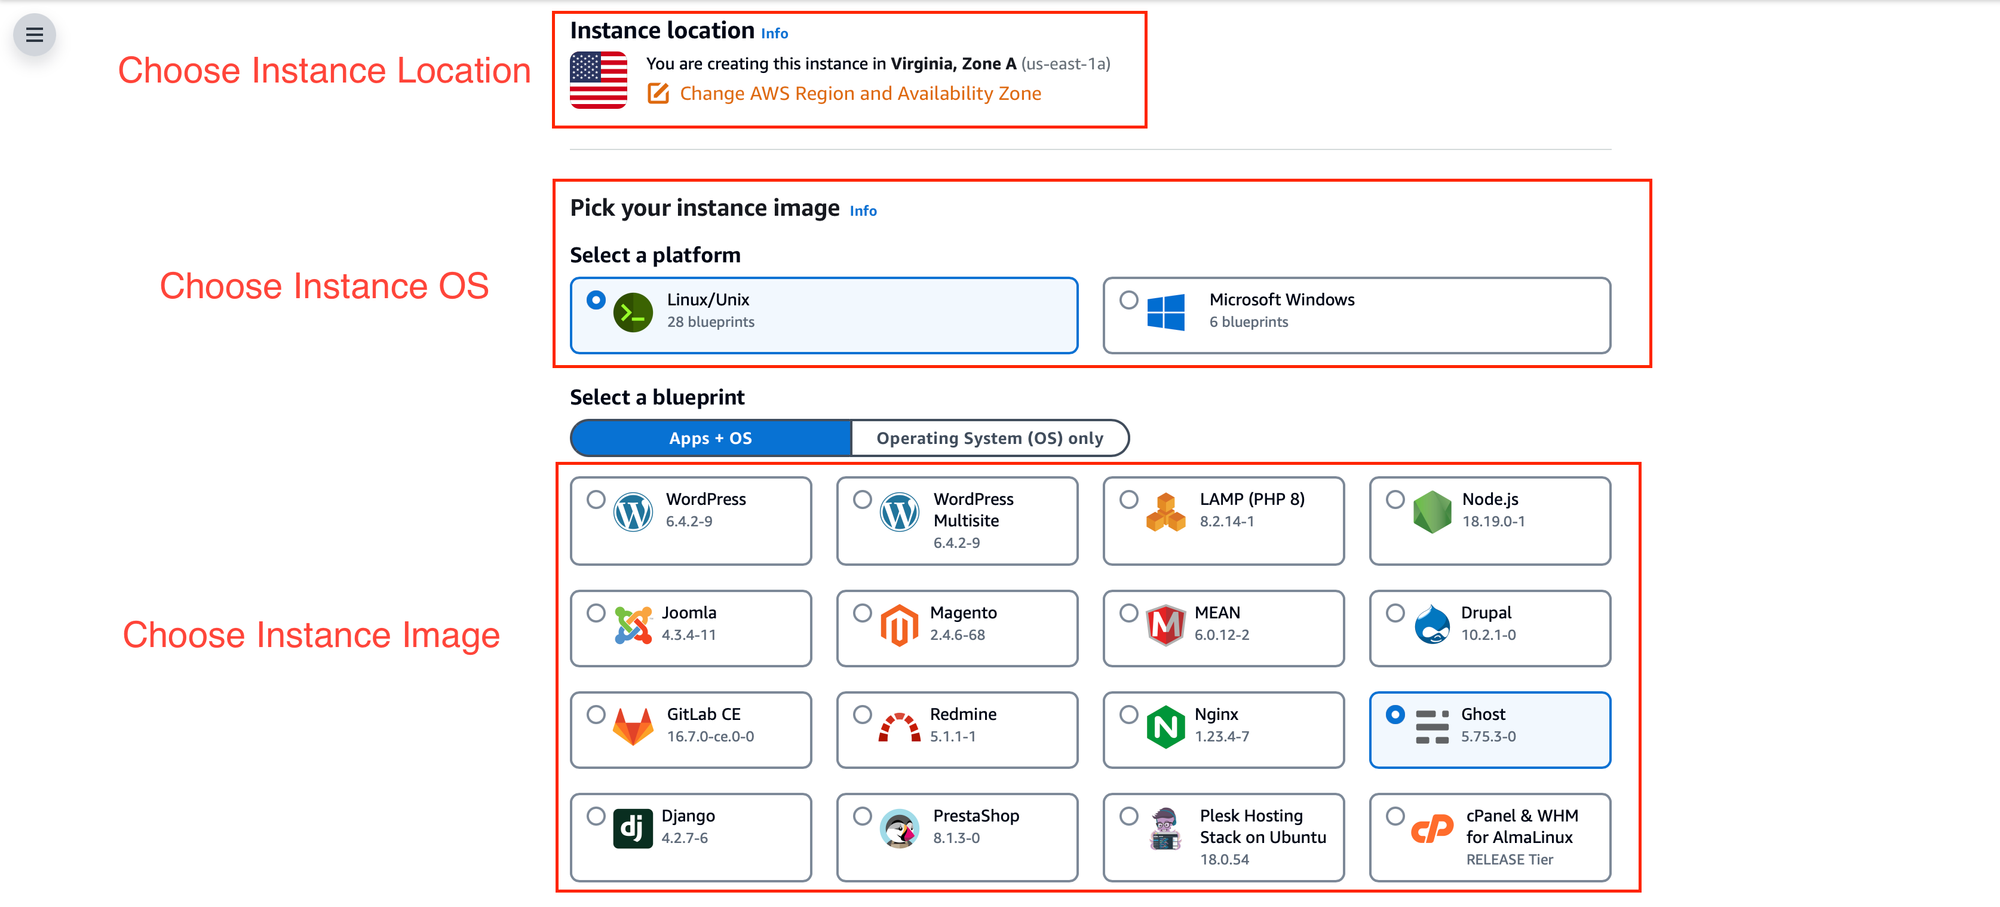
For this site we will going with the following options
- Instance Location: Virginia
- Select a platform: Linux/Unix
- Select a blueprint: Ghost
- Select a size: $5/$10 option
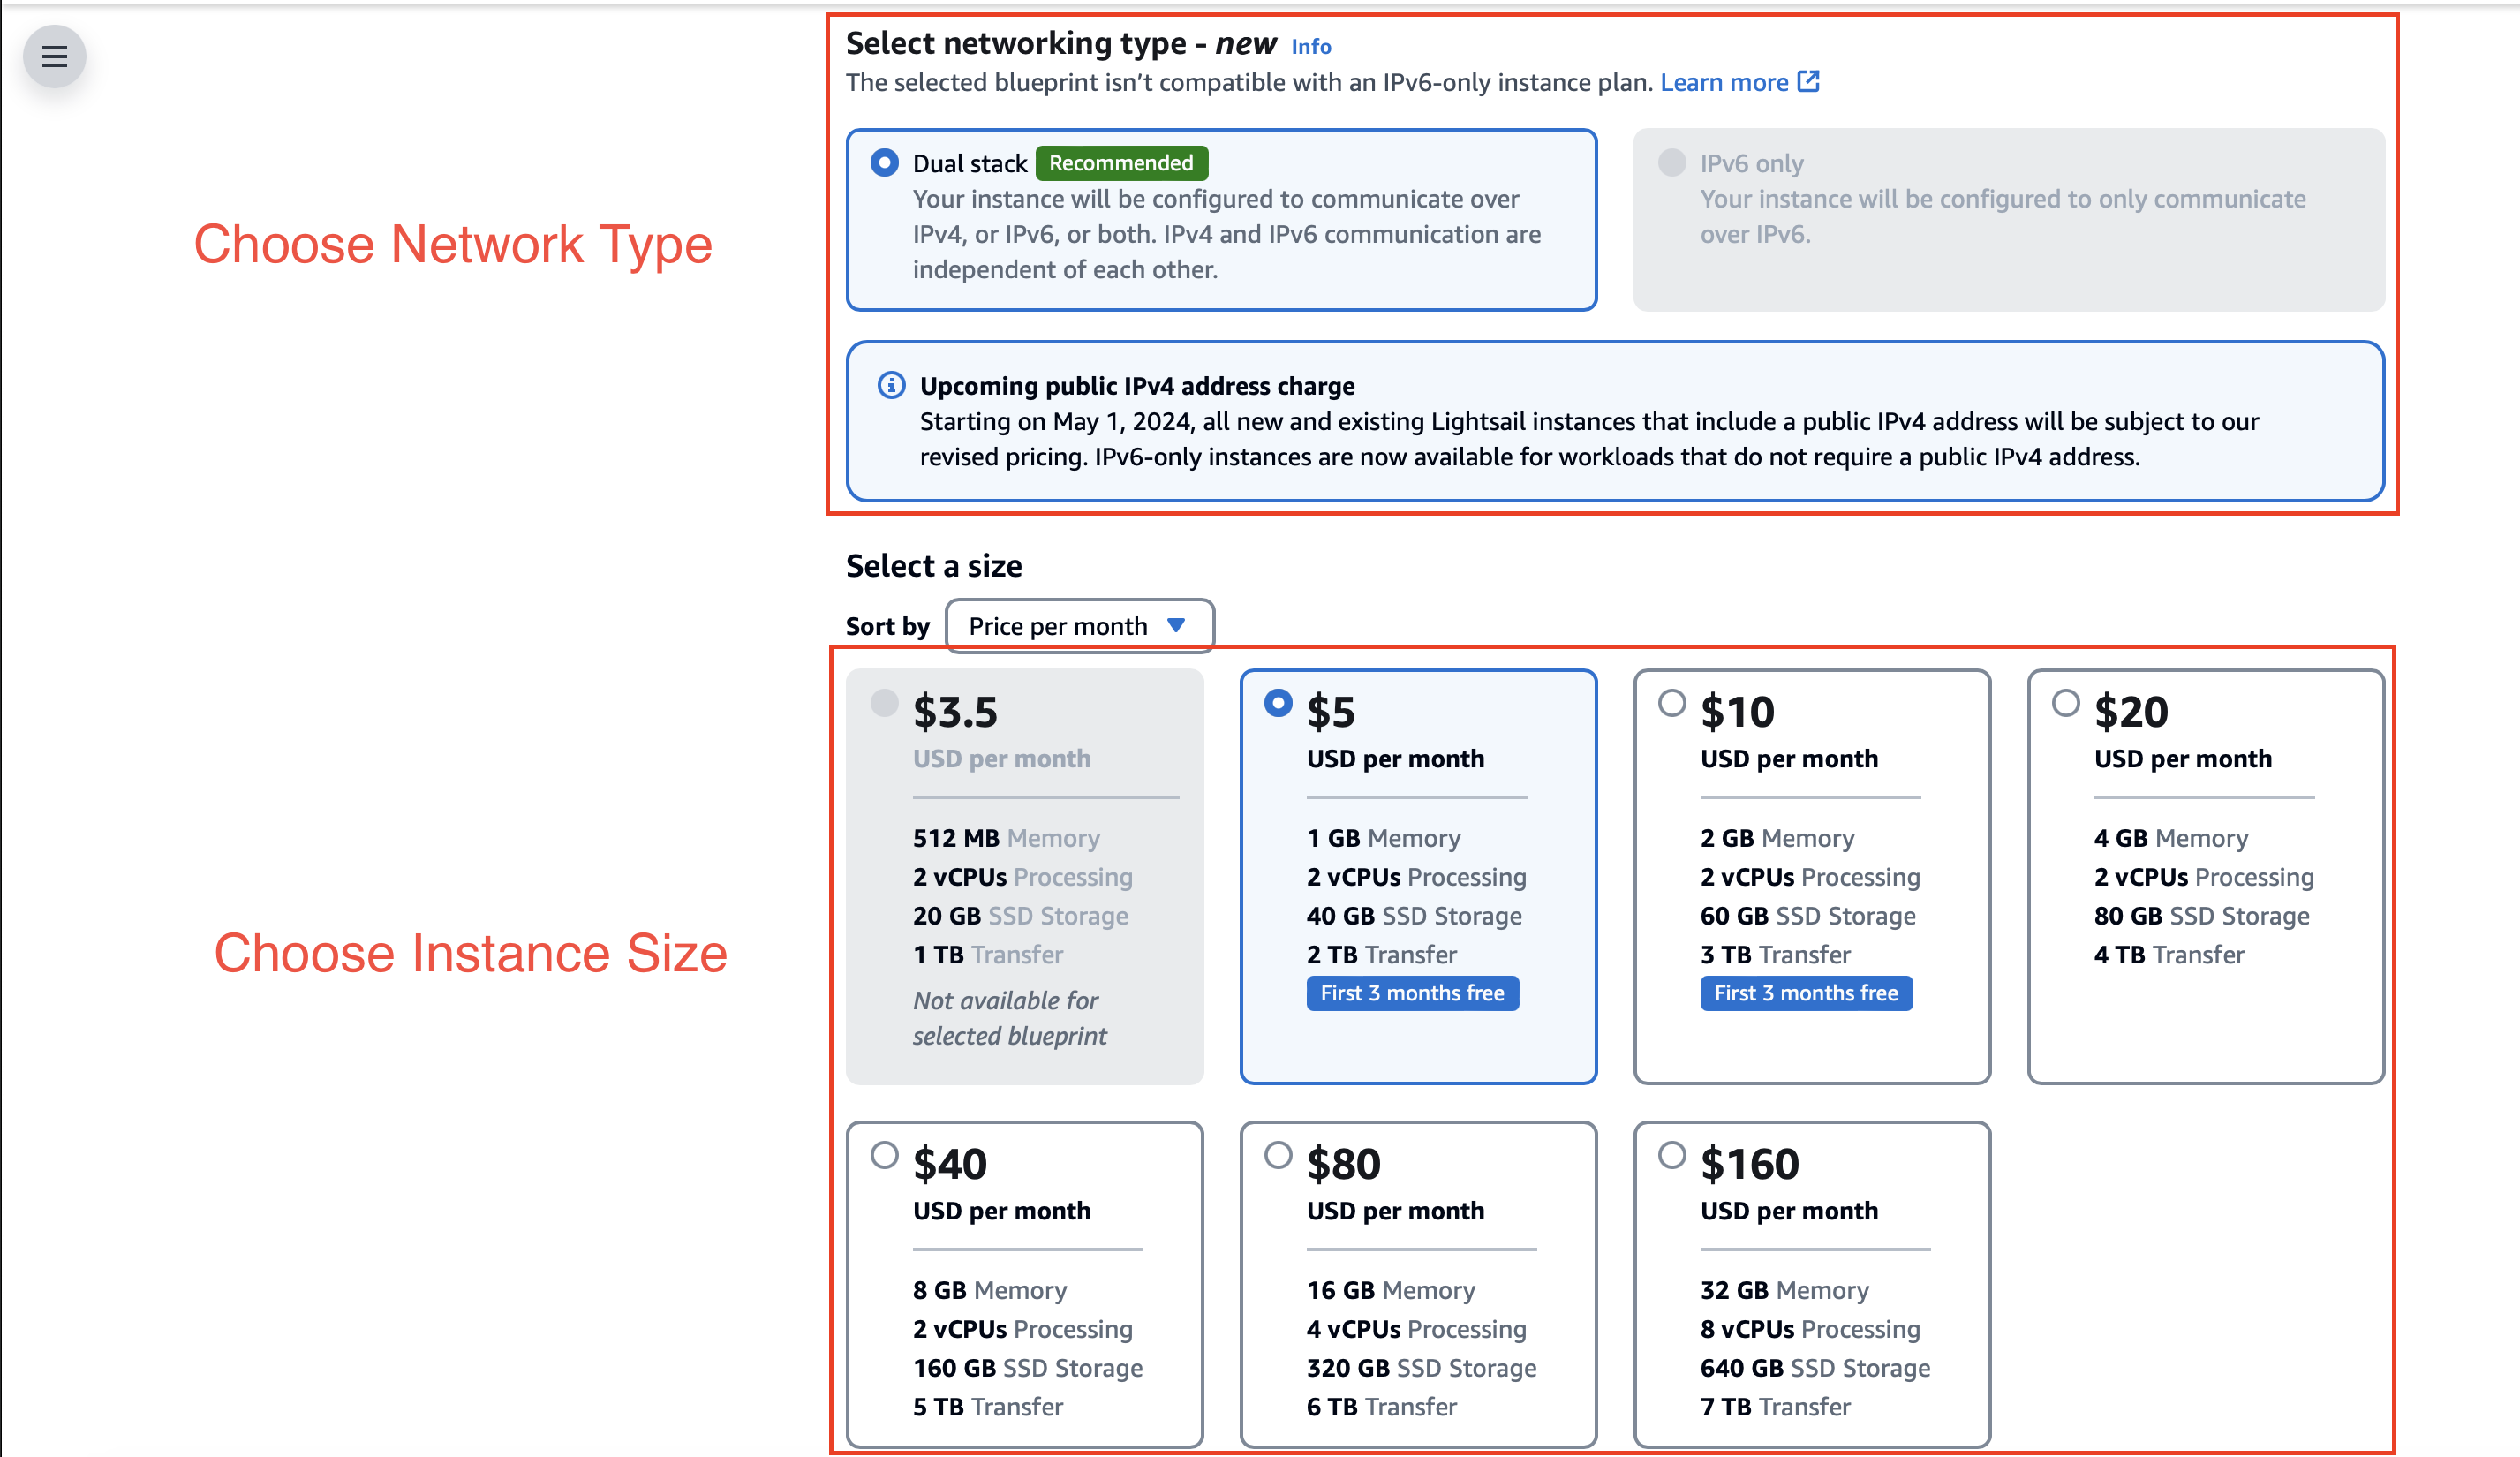
Once you have configured your instance how you like it, click on the "Create Instance" button at the bottom of the page. AWS Lightsail will now go through the process of spinning everything up based on your configuration. It should take a few minutes before everything is ready to go from here.
2. Get the Default Password
Now that our new instance has been created, one of the things it will do is generate a default password for our Ghost CMS.
First we are going to navigate to the instance that we just created. Once there, navigate to the connect option, if it doesn't default you there. The connect tab will provide you with a few options to connect to your instance, one is through the browser, the other is through SSH client/terminal. I decided to use the browser to make it simpler.
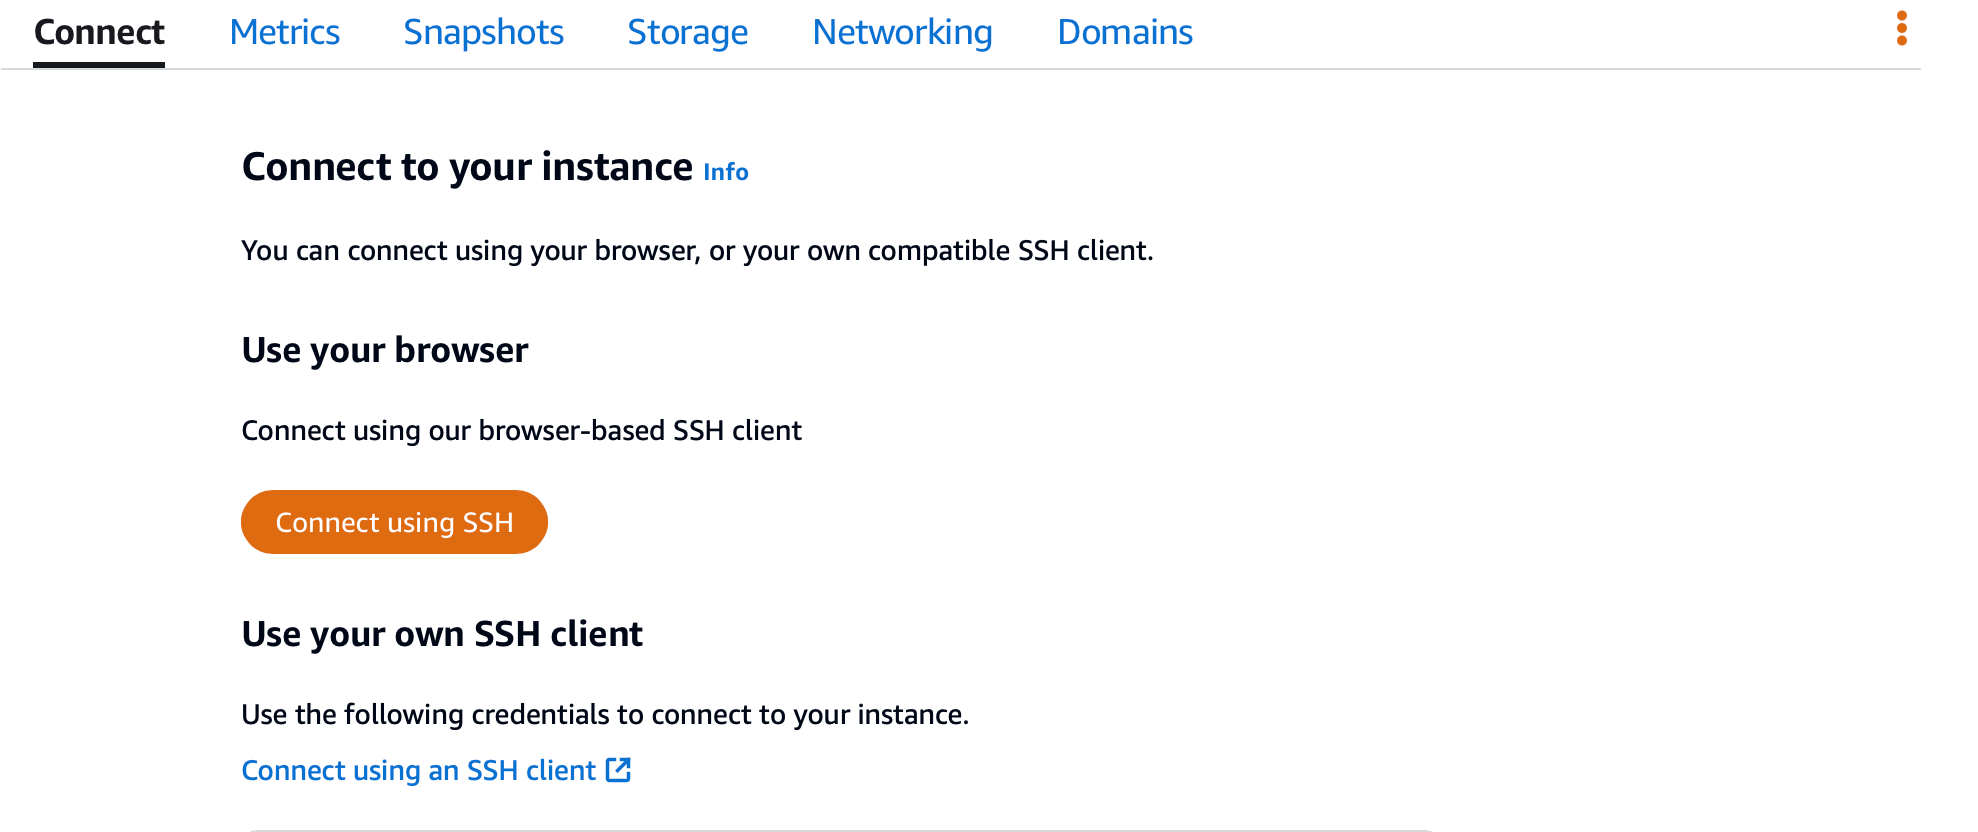
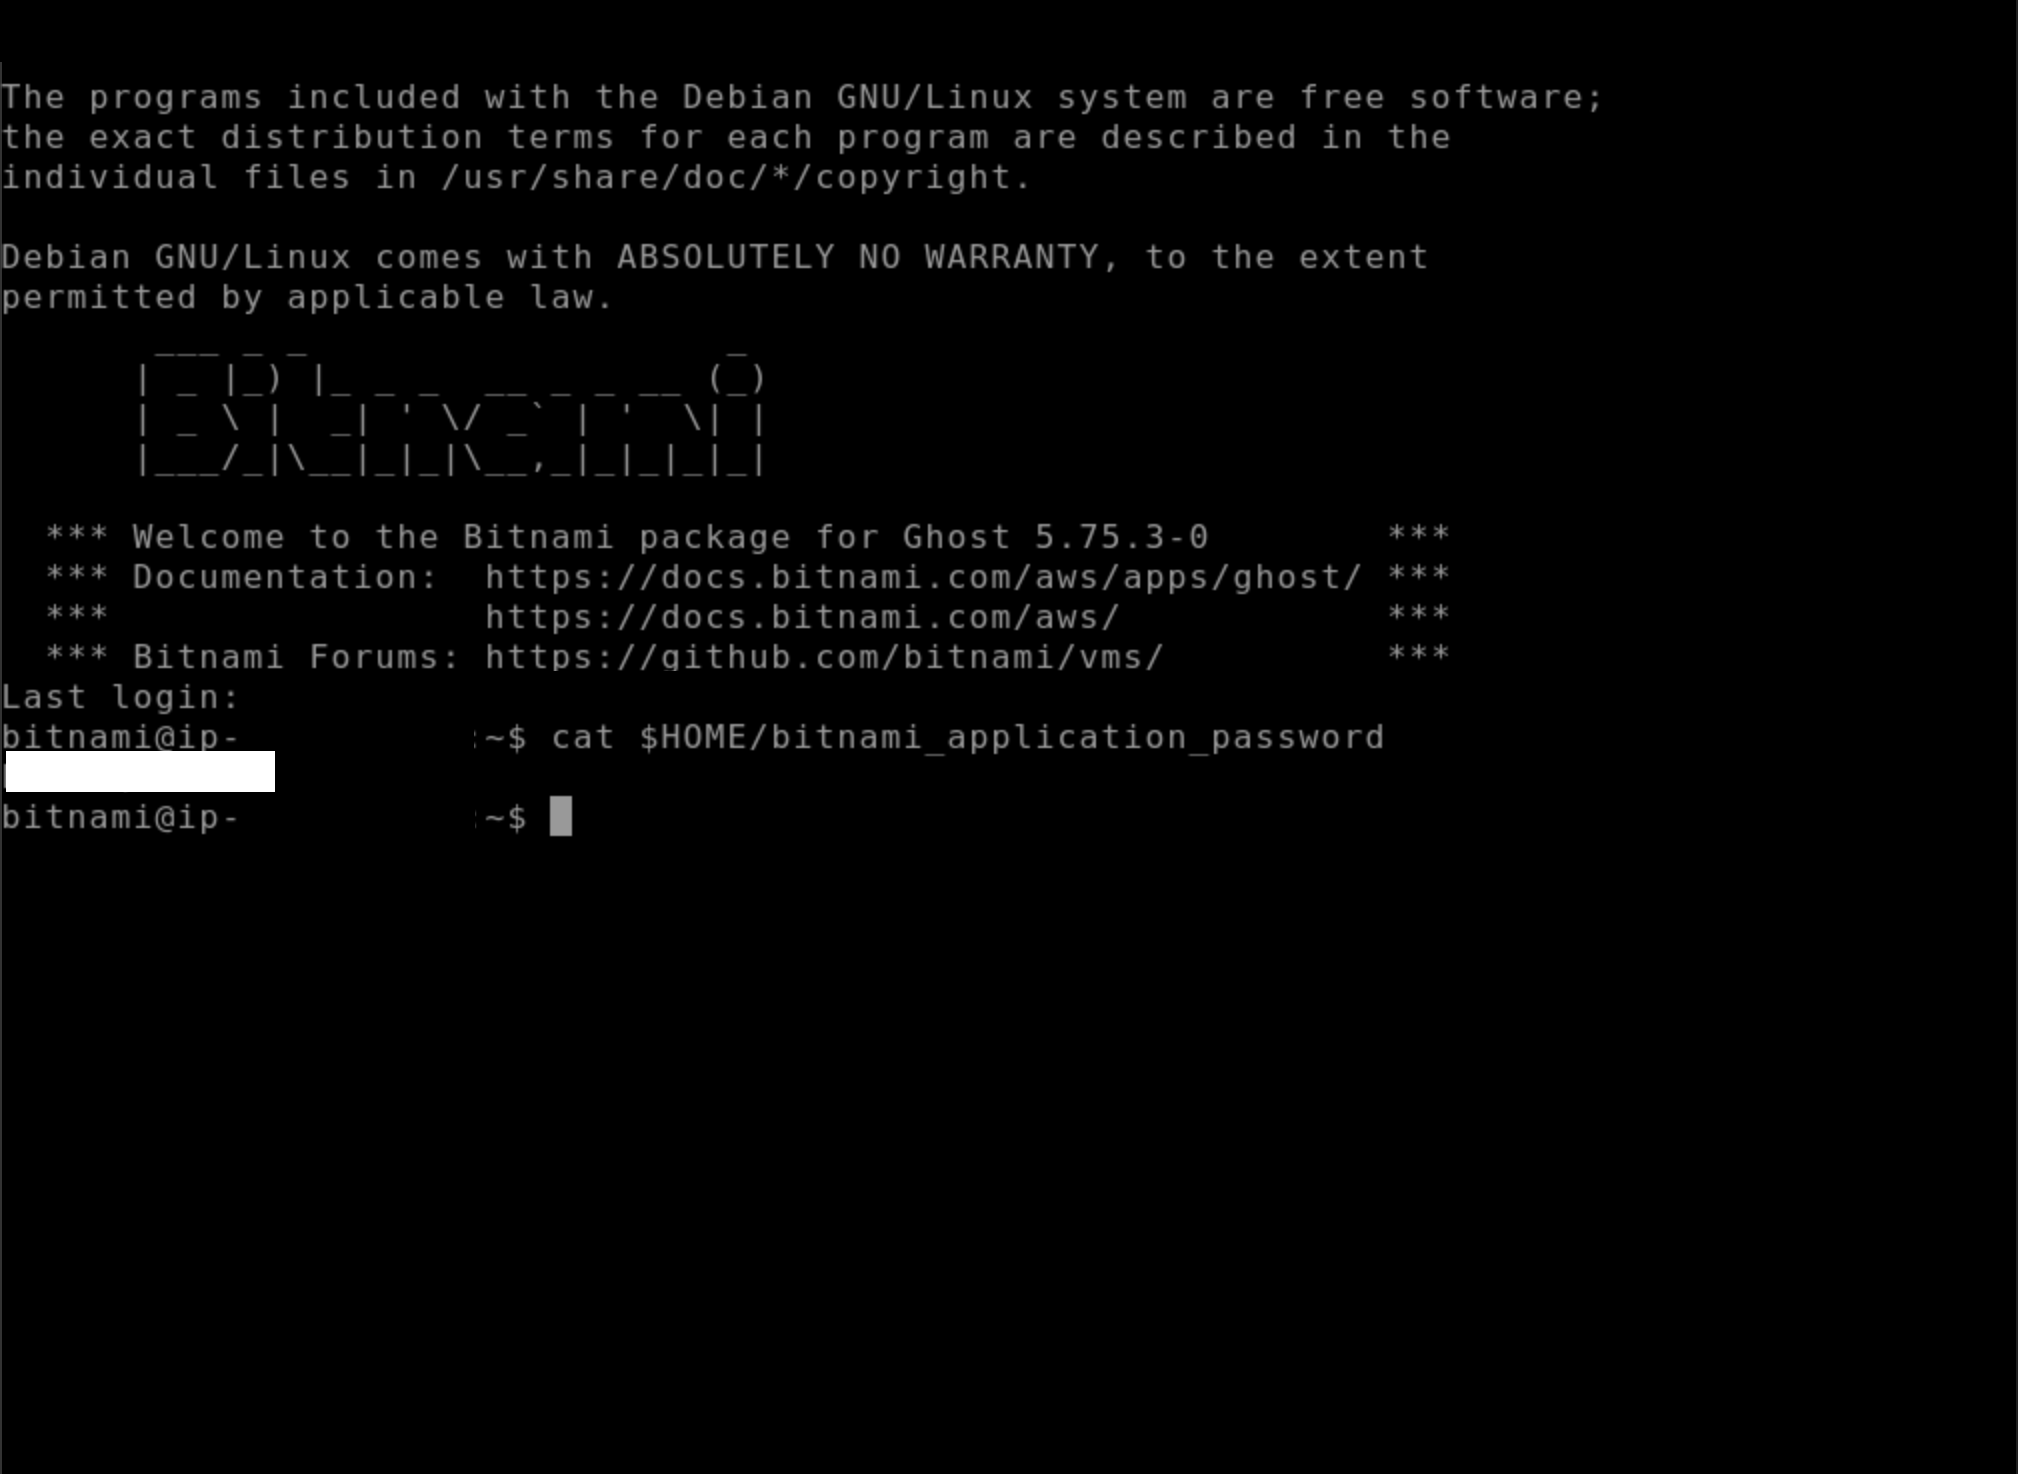
Simply click on the "Connect using SSH" button and a terminal will popup in another browser. Once inside the instance enter the following command:
cat $HOME/bitnami_application_passwordCommand to collect the default password
With the password collected, put it somewhere to copy-and-paste it later such as a txt file.
3. Create a Static IP for the Instance
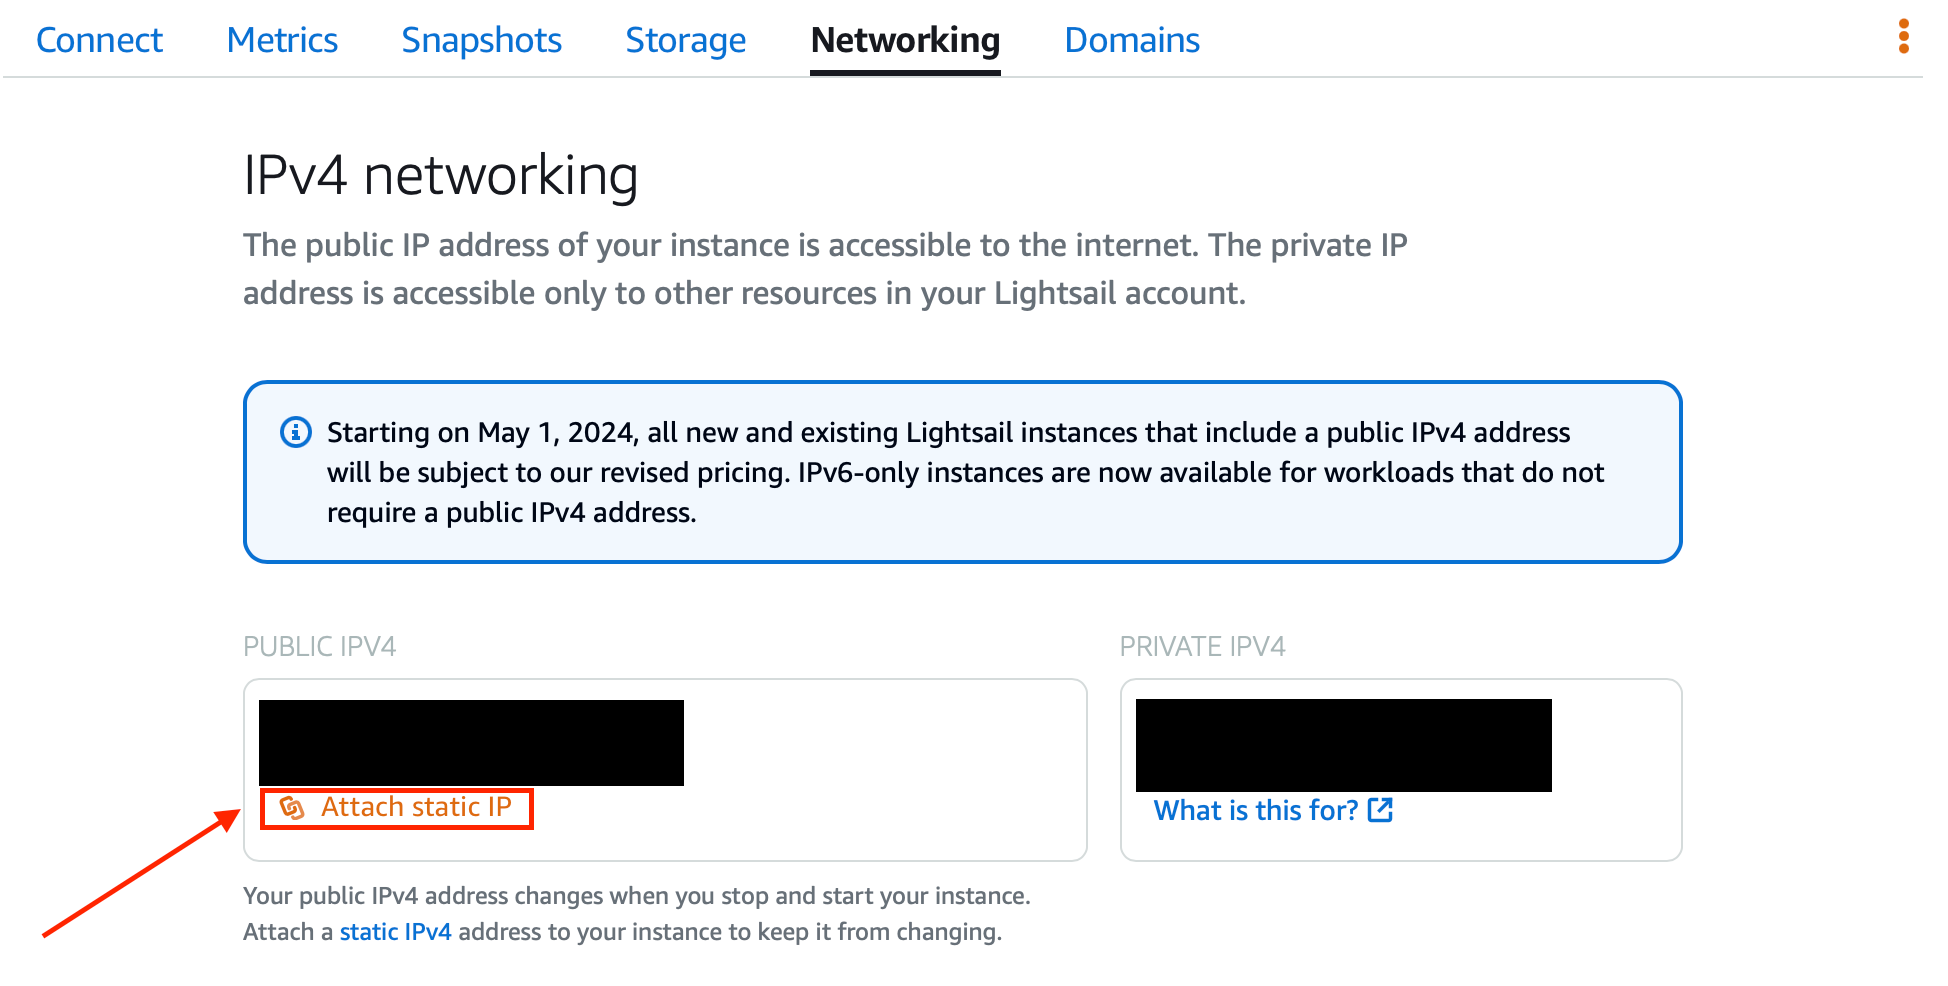
The next thing to do is add a static IP to instance. The reason for this is every time you stop and start the instance a new public IP is assigned to the instance. Later when we connect the domain to the instances we will use the static IP so we don't have to keep updating the DNS records.
You can create a static IP in two locations within the instance or the networking tab on the left. I choose to do it through the instance, to immediately attach the static IP to the instance, rather than go through the process of creating, then attaching the static IP.
4. Connect Static IP to the Instance
Once the static IP is created you can find it where the public IP used to be. Make note or copy-and-paste it. If you haven't closed the browser terminal head back over to it, but if you did close it go back and open a new terminal. Enter the following command in the terminal.
sudo /opt/bitnami/configure_app_domain --domain <StaticIP>Command to let instance know to monitor traffic for Static IPs
With the above bash command your instance should now aware of the static IP.
5. Login to Ghost
We're now going to make sure that we have Ghost installed, and our instance has updated to the static IP. Using your static IP go to the following URL
http://<Static IP>/ghost
Use the following to gain access to the Admin Dashboard:
Username: user@example.com
Password: [Default Password]
From here you can either customize your Ghost site how you see fit or you can continue with the setup.
6. Update DNS Records
So far we have launched two AWS Lightsail resources, gained access to our AWS Lightsail server, modified the server, and gained access to our Ghost CMS. While we can direct traffic with an IP Address, most people will struggle to remember how to get to your site so let's connect a domain to our site.
AWS recommends that you transfer DNS Management to Lightsail if you are going to be working Lightsail, however I will be keeping my domain separate from AWS Lightsail, so I will add the records necessary to connect the instance to the domain.
As I am using this blog for my domain name (Secondary-Level Domain + Top-Level Domain) I will add two records to my DNS to make this work.
- Record Name: @/example.com
- Record Type: A
- Value: <AWS Lightsail Static IP>
- TTL: 300
The record name I used denotes to use either the domain itself or the origin of the record. The record type "A" is the address record type. We set the value to our static IP and lastly set the TTL to 300 meaning a record persists for 300 seconds.
7. Connect Instance with Domain
With the DNS records added we will now connect our instance with our new domain. Connect to the instance through SSH, once your are connected we will be doing something similar, if not exactly the same as what we did in Step 3 for Static IPs
sudo /opt/bitnami/configure_app_domain --domain <DomainName>Command to let instance know to monitor traffic for Domains
8. Encrypt traffic for HTTPS
The issue with our current configuration is we are using HTTP instead of HTTPS, due to not encrypting the traffic from our server. Since this is a Bitnami Image we will be using the Bitnami HTTPS Configuration Tool (bncert-tool). Enter the following command:
sudo /opt/bitnami/bncert-toolCommand to begin the configuration for Bitnami HTTPS Configuration Tool
Once the tool begins enter the primary and secondary domain you want to use. Make sure that you have a space to separate the domains. You can you use either domains top level domains or subdomains. Examples of domains being: example.com, www.example.com or blog.example.com, www.blog.example.com

We will now handle the traffic redirection for the site we want to:
- Confirm HTTP to HTTPS redirection
- Confirm non-www to www redirection
- Reject www to non-ww redirection
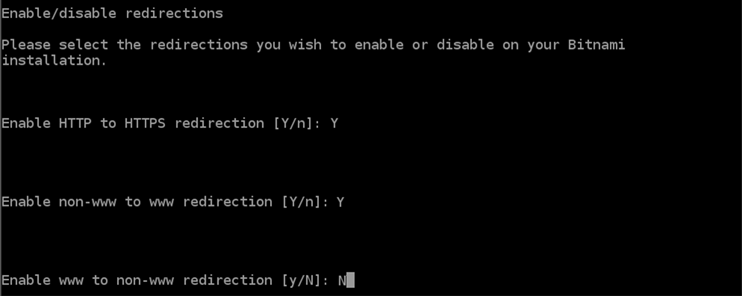
Enter the email to associate for the Let's Encrypt Certificate, and confirm that you agree to the Let's Encrypt Subscribe Agreement

It should issue and validate the certificate for you allow HTTPS traffic for your site.
9. Restart Ghost & Apache
One of the things I had to do in order for the HTTPS traffic redirect to work was to restart both Ghost & Apache. Enter the following commands in order to restart the services.
sudo /opt/bitnami/ctlscript.sh restart ghost
sudo /opt/bitnami/ctlscript.sh restart apache
Commands to restart both the Ghost & Apache Service
Unfortunately, this might cause an issue with Ghost restarting, but it stating if we were to check that the service isn't running. In order to fix that problem I recommend the next step which is restarting the instance completely.
10. Restart Instance
You can either restart the instance in the CLI/SSH or using the AWS console. I prefer to use the AWS Console as when you use the CLI you disconnect from the instance and it will take a few minutes for everything to be up and running again.
You can find the "Reboot" button in the upper right of the instance. Simply click on it and reboot the instance.

11. Login to Ghost using the Domain
Having just changed from HTTP with Static IP to HTTPS with Domain we want to login into Ghost again and make sure that:
- Ghost is running correctly
- HTTPS traffic is used
Simply go to:
http://<Domain>/ghost
Enter the default credentials if you haven't updated them yet, or enter your updated credentials if you have changed the.
12. Create a snapshot of the instance
Lastly, as a precaution we want to make a snapshot of instance. Navigate to "Snapshot" within your instance. Once there click on "Create snapshot" to manually create a snapshot instance. With that finished you now have a new Ghost site launched, connected to a domain, and traffic encrypted for your site.
